To create a Class is the first thing to do. Classes is where students are asigned and also where assessments can be attached
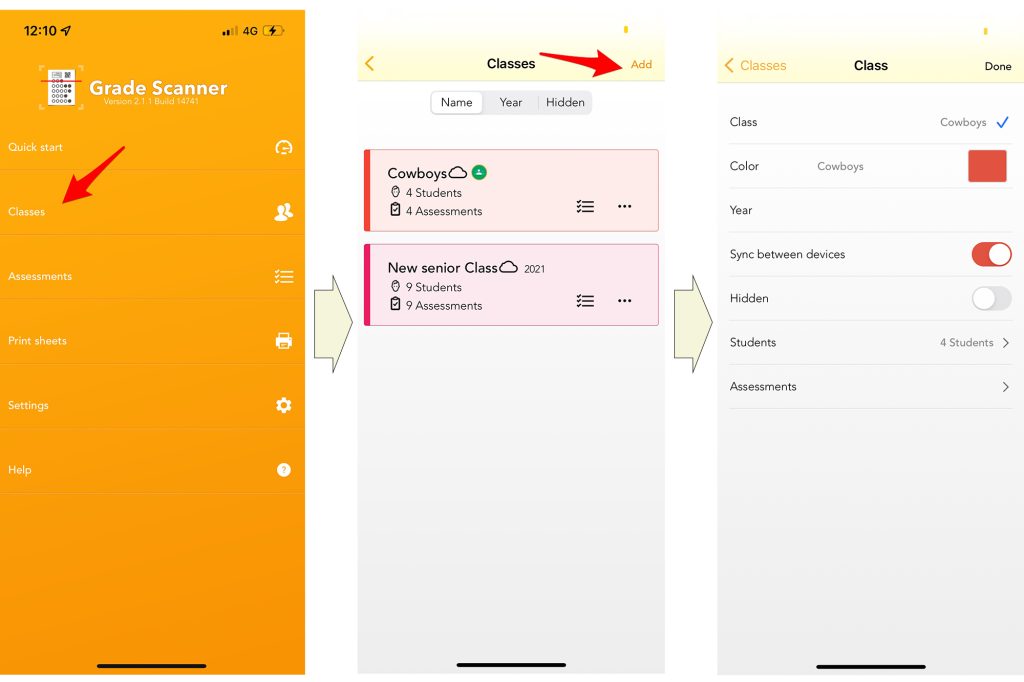
To create a Class select Classes in the main menu (first image) and once in the classess-view tap on the Add button (second image) , a configuration screen will appear (third image):
Class: In this field you must enter the name of the Class.
Color: One color can be selected for each Class.
Year: In this field you can enter the academic year.
Sync between devices: This is a switch that will syncronize the data of this class with the GradeScanner installed in your iPad or in another iPhone sharing your Apple-ID.
Hidden: This switch will remove this class from the main list of clases, once activated the class will be seen only when selecting the tab Hidden in list of Classes.
Students: Selecting this option will show the students list assigned to this class. You can add new students with the button (+).
Importing students: Students can be imported in the following ways:
- Import from your contacts
- Import from a XLS document
- Import from an iDoceo class template
- Add the students from Google Classroom
Assessments: Selecting this option will show the list of assessments attached to this class and also attach new assessments if needed.
Importing a Class from iDoceo
If you are using iDoceo Gradebook, you can send your classes from iDoceo to GradeScanner by sharing its with templates created from iDoceo.